Auto captions went from nice-to-have to table stakes the moment everyone started watching video on mute. Premiere Pro generates them from your sequence audio in a few clicks, and the whole job, transcript to styled captions, takes minutes. Here's the exact path, plus the same job in DaVinci Resolve.
Does Premiere Pro have auto captions?
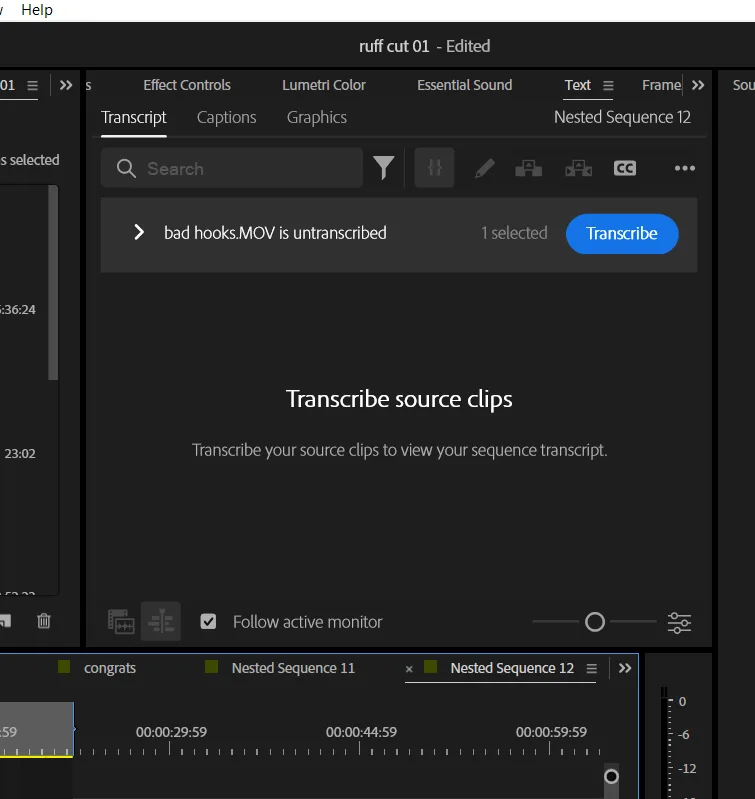
Yes. Premiere Pro has auto captions built in through Speech to Text, which transcribes your sequence and turns the transcript into a caption track. It ships inside the app, no plugin and no separate service. The feature lives in the Text panel, which is the one piece of geography worth memorizing before the steps below.
How to auto generate captions in Premiere Pro
To auto generate captions in Premiere Pro, transcribe the sequence in the Text panel, then create captions from the transcript.
- Open the Text panel. If it isn't visible, it's under Window in the menu bar.
- In the Transcript tab, transcribe your sequence. Premiere's Speech to Text runs through the audio and hands back a full transcript, speakers and all.
- Read the transcript once and fix what's wrong there. Every correction you make in text saves a correction on a caption later.
- Switch to the Captions tab and choose Create captions from transcript. Premiere builds a caption track aligned to the dialogue, with line length and duration settings up front.
- Play it back. The captions sit on their own track above the video, so you can nudge, split or retime any of them like clips.
Auto captions Premiere Pro: styling and export
Style the caption track once, and every caption follows it.
Select a caption and the Essential Graphics panel exposes font, size, fill, stroke and background. Set it on one caption, save it as a track style, and the whole track updates, which is the difference between styling a video and styling 300 tiny text boxes. Keep it boring on purpose. High contrast, a real background box, nothing animated. Captions that are fun to look at are hard to read.
At export, captions leave in one of two ways. A sidecar file (SRT is the one every platform eats) keeps them as data viewers can toggle, and burn-in prints them into the pixels permanently. Social clips burn in, YouTube uploads take the sidecar so the platform indexes the words. Adobe's Speech to Text guide covers the transcription side in more depth.
Auto captions DaVinci Resolve: the same job in Resolve
DaVinci Resolve auto generates captions from the Timeline menu's Create Subtitles from Audio, and it's a DaVinci Resolve Studio feature.
The free edition doesn't include it. Studio runs the transcription with Resolve's Neural Engine on your machine, builds a subtitle track with punctuation handled, and hands you per-line length and gap settings on the way in. If you're captioning in the free version, the route is an SRT generated elsewhere and imported onto a subtitle track.
Caption the clean cut, not the raw one
Auto captions transcribe whatever you feed them, fillers and dead air included.
Run the transcription on a raw talking-head cut and the captions faithfully reproduce every um, every false start, every four-second pause where nothing is said. Then you're editing captions instead of watching playback. The order that works is cleanup first, captions last. Speech Cleanup strips the fillers and false starts, Silence Remover cuts the dead air, and SilentCut for Premiere Pro lands those cuts on your timeline before the Text panel ever runs. Caption the tightened cut and the transcript comes back clean the first time. SilentCut (silentcut.ai) isn't public yet.